Archive
Enable support for Configuration Manager extensions in Windows Admin Center v2
Windows Admin Center (WAC) v1 (2311, MSI,…) has it’s own extension feed (https://aka.ms/sme-extension-feed):
With this older version of WAC we are able to extend WAC functionality with support for Configuration Manager Client and Configuration Manager Client Tools. New WAC (WAC v2) is using different extension feed and as of mid-February 2026 this feed doesn’t have Configuration Manager extension.
WAC v1 – default extensions:
Apps & features
Azure Backup
Azure File Sync
Azure hybrid center
Azure Kubernetes Service
Certificates
Cluster Creation
Cluster Manager
Developer Guide
Devices
Diagnostics
Events
Failover cluster tools
Files & file sharing
Firewall
GPUs
Hardware Manager for Azure Stack HCI (Microsoft Hardware Only)
Local users & groups
Microsoft Defender for Cloud
Network ATC
Network Controller tools and SDN Virtual networks
Networks
Packet monitoring
Performance Monitor
PowerShell
Processes
Registry
Remote Desktop
Remote Support
Roles & features
Scheduled tasks
SDN Gateway connections
SDN infrastructure
SDN Load balancers
SDN Logical networks
SDN Network security groups
SDN Route tables
Security
Server Manager and Computer Management
Services
Storage
Storage Migration Service
Storage Replica
System Insights
Updates
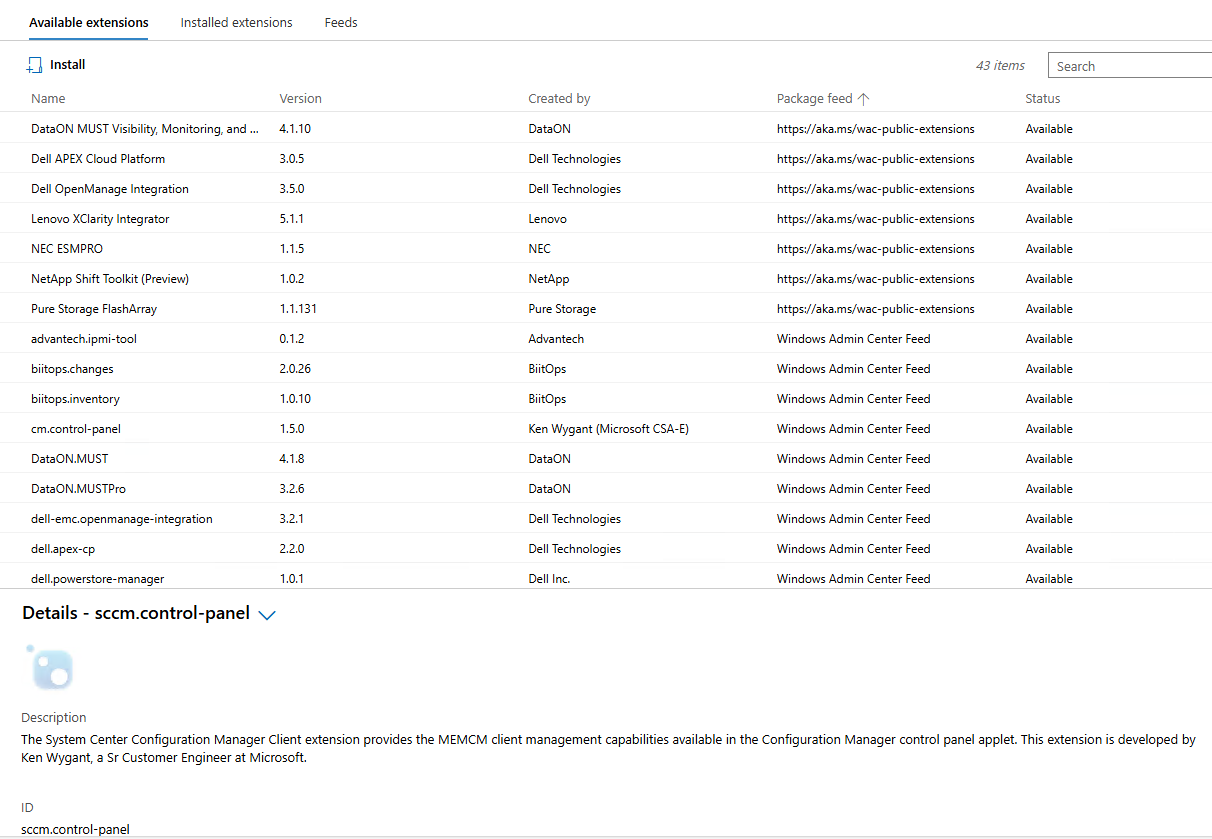
WAC v1 – available extensions:
Active Directory
Advantech IPMI Management (Preview)
Azure Cloud Shell (Preview)
Azure Extended Network
BiitOps Changes
BiitOps Inventory
Configuration Manager Client (Preview)
Configuration Manager Client Tools (Preview)
Containers
DataON MUST Pro
DataON MUST Visibility, Monitoring, and Management Tool
Dell APEX Cloud Platform
Dell OpenManage Integration
Dell PowerPath
Dell PowerStore Manager
DHCP (Preview)
DNS
Fujitsu ServerView® Health
Fujitsu ServerView® RAID
FUJITSU Software Infrastructure Manager
HPE Azure Stack HCI Cluster Deployment and Update Snap-In
HPE OneView WAC Extension
HPE Server and Azure Stack HCI WAC Extensions
HPE Storage
Intel® Server Debug and Provisioning Tool
Lenovo XClarity Integrator
Marvell QLogic Fibre Channel QConvergeConsole Extension
msft.iis.iis-management
NEC ESMPRO
Pure Storage FlashArray
QCT Management Suite
SDN Public IP addresses (Preview)
secureguard blazics Updates
Security (Preview)
Thomas-Krenn.AG | Driver & Firmware Updates
Thomas-Krenn.AG | S2D Micro-Cluster
WAC v2 – default extensions:
Apps & features
Azure Backup
Azure File Sync
Azure hybrid center
Certificates
Cluster Creation
Cluster Manager
Developer Guide
Devices
Events
Failover cluster tools
Files & file sharing
Firewall
Local users & groups
Network ATC
Network Controller tools and SDN Virtual networks
Networks
Packet monitoring
Performance Monitor
PowerShell
Processes
Registry
Remote Desktop
Roles & features
Scheduled tasks
SDN Gateway connections
SDN infrastructure
SDN Load balancers
SDN Logical networks
SDN Network security groups
SDN Route tables
Security
Server Manager and Computer Management
Services
Storage
Storage Migration Service
Storage Replica
System Insights
Updates
Virtual machines and switches
Windows LAPS
WAC v2 – available extensions:
Active Directory
Azure Kubernetes Service
Containers
DataON MUST Visibility, Monitoring, and Management Tool
Dell APEX Cloud Platform
Dell OpenManage Integration
DHCP
DNS
GPUs
Lenovo XClarity Integrator
NEC ESMPRO
NetApp Shift Toolkit (Preview)
Pure Storage FlashArray
VM Conversion (Preview)
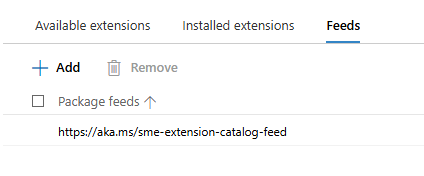
What happens if we add WAC v1 extension feed to WAC v2?
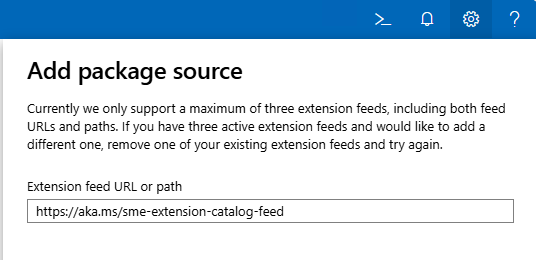
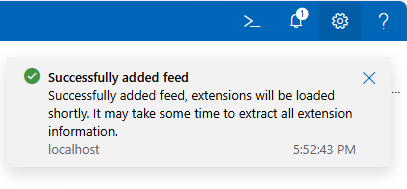
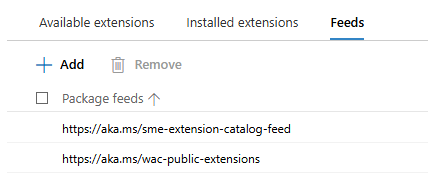
Hm, it gets successfully added…
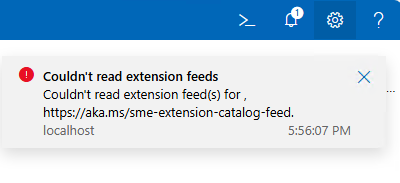
But, does it actually work? Well, no…
To get support for old extension feed in WAC v2, we are still missing one key configuration change:
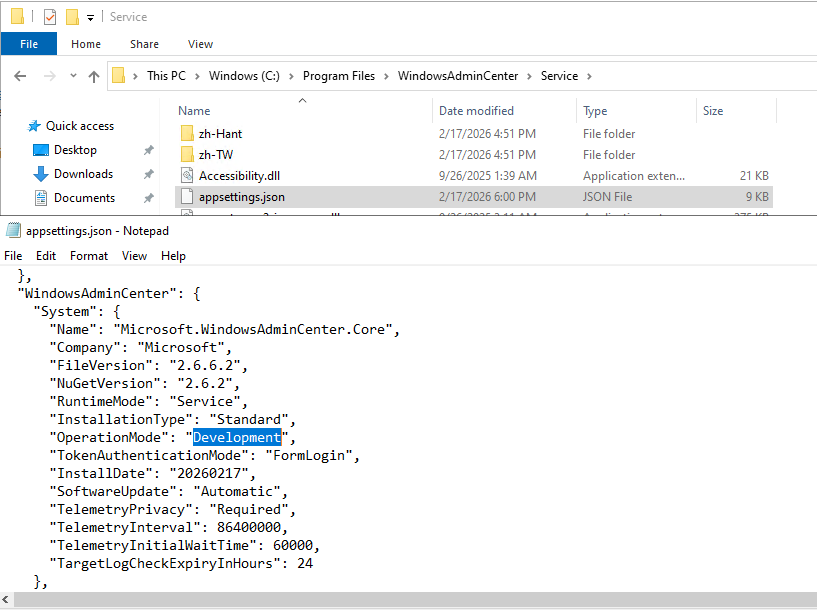
We need to change WAC “operation mode” from “Production” to “Development”. And because this is WAC service configuration file we just changed, we must restart WAC service (Restart-Service -Name WindowsAdminCenter) before we can see this change applied to our WAC portal:
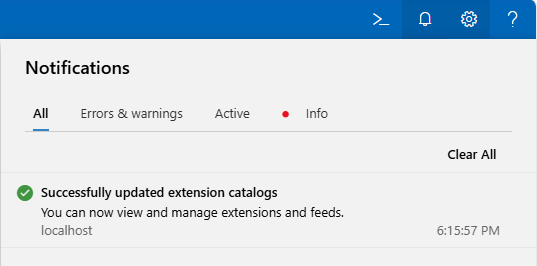
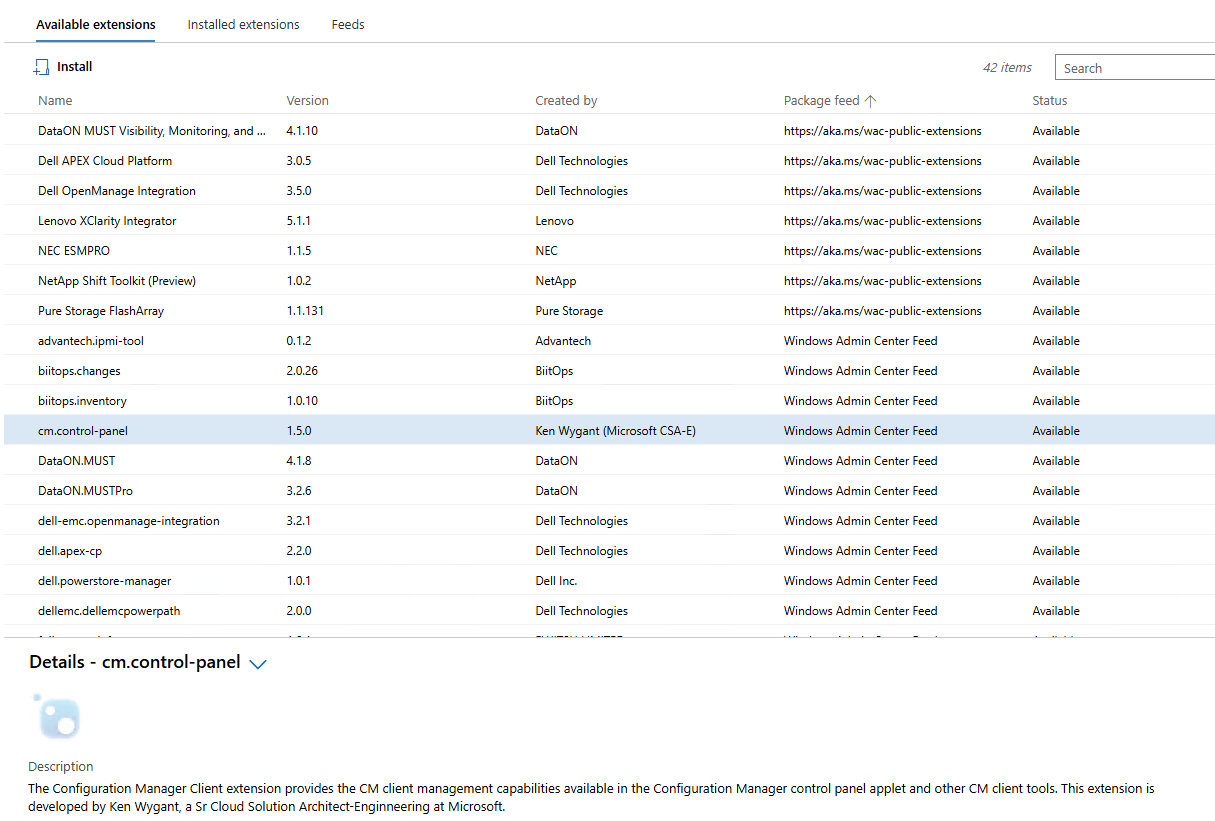
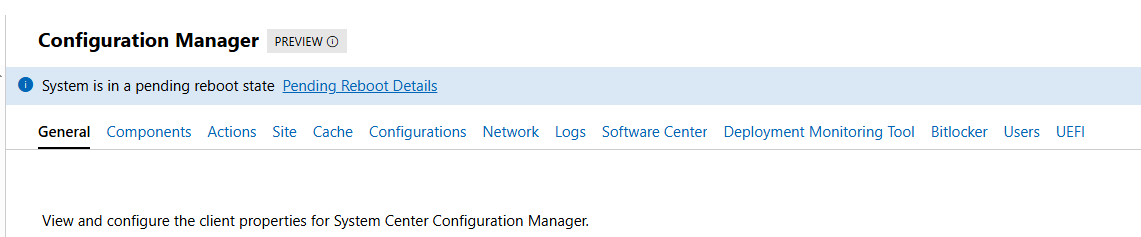
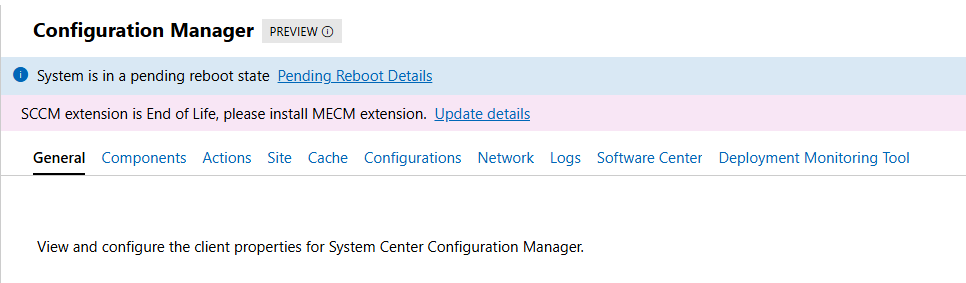
If all goes well, we can now see all “old WAC v1” extensions, including the two for the Configuration Manager Clients:
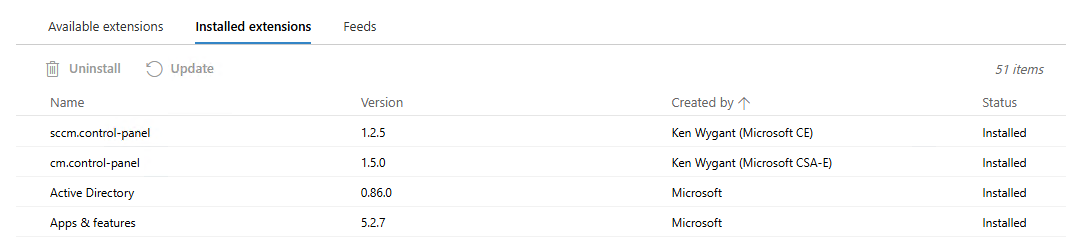
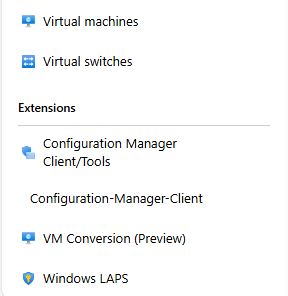
CM extensions installed side-by-side with new extensions on WAC v2:
Until we meet again…
Deep dive into Windows Admin Center v2 (WACv2) installation
Few months after my last blog post on the subject of WAC, Microsoft released updated preview version of their next Windows Admin Center v2 (announcement with detailed info). That version changed some of the problematic behavior of first preview installer (for the better) and introduced new checks and steps that broke some of the scenarios from before. Later, towards the end of the year 2024, Microsoft released stable, production ready version of WACv2 – version 2410 (file name) or 2.4.0.0 (version in Control Panel and WindowsAdminCenter.exe).
Since this new version brought few nice and welcome changes, I decided to write an update to the original blog post. We will also check if and how we can get it running on DC (NOT supported or recommended for production).
Installation
Before we start with the installation of WACv2, we should check list of known issues and troubleshooting steps – just to avoid any unnecessary troubleshooting (been there, done that…).
If we want to start the installation, we need the installer files… As it was with previous version, we can find the latest version of WAC on Microsoft Evaluation Center: Windows Admin Center (download, direct download). If we want to work specifically with version 2410, we can find direct link for that version. (FYI. As of this writing, since WACv2 version 2410, Insider preview version is not the latest version of WAC anymore.)
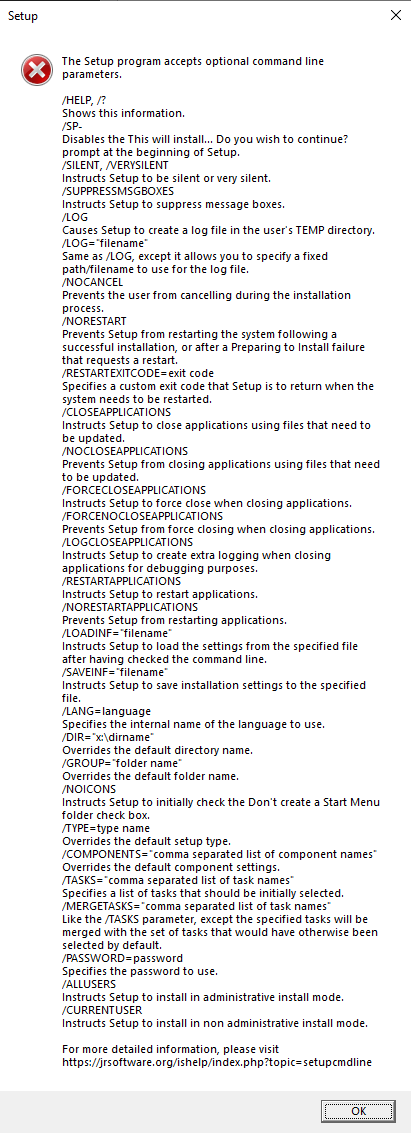
All preview versions of WACv2 installers including now GA version 2410 of WACv2 were built with Inno Setup:

If we want to, we can customize some of the setup experience (silent, verysilent, log, saveinf, loadinf,…) with Inno Setup command line parameters (more info here):
install_script.iss
If we want to see what’s hiding inside the installer, we can use tools like innoextract or UniExtract2 to get out all or some of the files. When I prefer to use GUI tools, I like InnoUnpacker – this one is nice because it’s usually able to extract setup instructions and save them in install_script.iss. And if we want to extract just the installer instructions, we can do just that as well:

Since the install_script.iss file contains almost 7000 rows, I won’t be adding it here… But we can find it for reference in my GitHub repo for WACv2: install_script.iss. What we can see inside is general info about the package and few other sections:
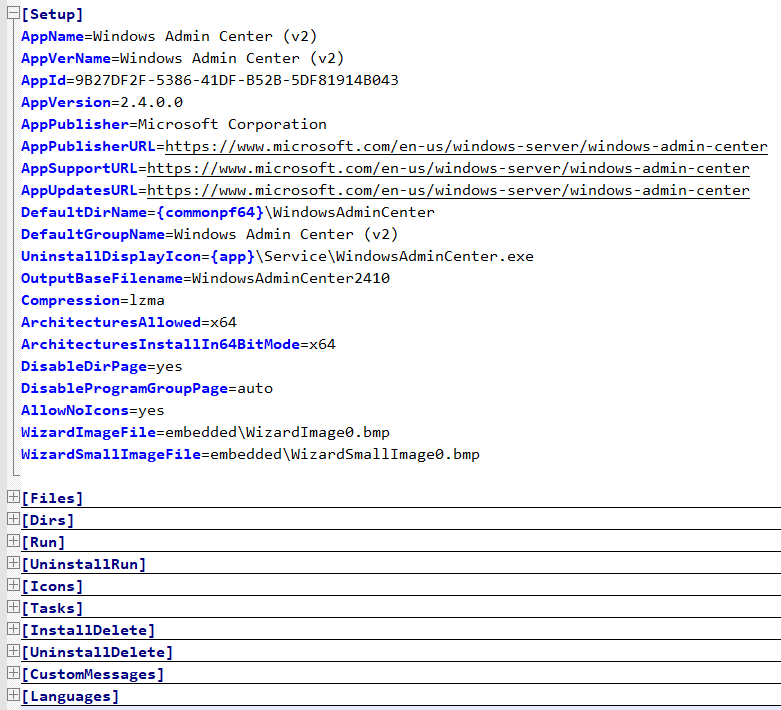
For the analysis and/or troubleshooting of the setup procedure the most interesting section is “Run“, since it gives us list of all the PowerShell commands (and their locations in order of execution) that are used during the installation of WACv2 (check below for more info).
With one exception, all of the cmdlets used during the installation are stored and loaded from one module: Microsoft.WindowsAdminCenter.Configuration. Only Update-WACEnvironment is loaded from Microsoft.WindowsAdminCenter.Migration.
Installer logs
During/after the installation of WACv2 we can find verbose installation log in user’s temp folder “%temp%\Setup Log yyyy-MM-dd #00x.txt” and summary log at “C:\ProgramData\WindowsAdminCenter\Logs\Configuration.log”. If something goes wrong during the installation, installer offers us to automatically open Configuration.log log file:
When we want to keep the installer log file, we should redirect it to custom location. We can do that with setup parameter: Start-Process "C:\WAC\WindowsAdminCenter2410.exe" -wait -ArgumentList "/log=C:\WAC\WWindowsAdminCenter2410.log"
If we do the supported installation (not on our domain controller), there shouldn’t be any errors. But if there are, now we know where to look for them.
Installer options
New installer gives us two modes of installation to choose from:

Express setup, as the name implies, is simplified version with most of the background cmdlets using the default values. If we want, we can run this mode silently, which means we can also run it remotely (probably… more info below):
# silent install locally - show progress
Start-Process "C:\WAC\WindowsAdminCenter2410.exe" -wait -ArgumentList "/log=C:\WAC\WWindowsAdminCenter2410.log /silent"

# silent install locally - no GUI
Start-Process "C:\WAC\WindowsAdminCenter2410.exe" -wait -ArgumentList "/log=C:\WAC\WWindowsAdminCenter2410.log /verysilent"
TLS certificate
In both Express and Custom modes, we can either use pre-installed TLS certificate or generate new self-signed certificate with 60 days validity:

If we have custom TLS certificate available (AD CS -> Web Server template), we need to specify Thumbprint of the certificate we want to use for WAC:
In this step we can notice one really nice improvement that was introduced in one of the last preview versions: Private Key Access Control is now AutoConfigured with Set-WACCertificateAcl cmdlet. What this means is when we want to use custom certificate, all we need to do during preparation phase is install the cert in local computer store (Cert:\LocalMachine\My\).
In the TLS certificate thumbprint step we should be able to select thumbprint of our certificate in the installer’s drop-down menu. If this drop-down doesn’t show our certificate thumbprint and we know it should be there, we can manually find certificate thumbprint like this: Get-ChildItem -Path Cert:\LocalMachine\My\and just paste in in the installer.
If for some reason auto configuration for ACLs doesn’t work, we can manually run the Set-WACCertificateAcl cmdlet. In this case we need Subject Name of the certificate:
Get-ChildItem -Path Cert:\LocalMachine\My\
Set-WACCertificateAcl -SubjectName CN=FS01.corp.contoso.com
All Set-WACCertificateAcl does, it adds one new ACL for NETWORK SERVICE with Full Control to the private key of the certificate (this is what installer does for us):

If we want to do the same manually (“the old way”) we can open: CertLM.msc -> Personal -> Certificates -> select certificate -> All Tasks -> Manage Private keys -> Add -> NETWORK SERVICE -> Full control.
Express setup – Windows Server
After we accept the Eula, select the installation mode and the type of certificate we want to use, there isn’t much else we can configure in express mode. We can select how do we want WAC to be updated and how much of the diagnostic data we want to send to Microsoft.
Express setup with self-signed TLS certificate on member server Windows Server 2022:

Express setup with pre-installed TLS certificate on member server Windows Server 2022:

# Express setup configuration with self-signed certificate (server OS)
Set-WACNetworkServiceAccess
New-Item C:\ProgramData\WindowsAdminCenter\Logs\Configuration.log -ItemType File -Force
Enable-WACPSRemoting
Remove-WACSelfSignedCertificate
New-WACSelfSignedCertificate -Fqdn FS01.corp.contoso.com
Set-WACEndpointFqdn -EndpointFqdn FS01.corp.contoso.com
Copy-WACTempUpdaterProcessFiles
Register-WACUpdaterScheduledTask
Register-WACService -Automatic
Set-WACInstallDate
Set-WACFileVersion -FileVersion 2.4.0.0
Set-WACNuGetVersion -NuGetVersion 2.4.0
Set-WACWinRmTrustedHosts -TrustAll
Set-WACWinRmOverHttps -Enable:$false
Set-WACSoftwareUpdateMode -Mode Automatic
Set-WACTelemetryPrivacy -Mode Required
Set-WACOperationMode -Mode Production
Set-WACLoginMode -Mode FormLogin
Set-WACCertificateSubjectName
Set-WACCertificateAcl
Set-WACHttpsPorts -WacPort 443 -ServicePortRangeStart 6601 -ServicePortRangeEnd 6610
Register-WACAccountManagementService
Register-WACFirewallRule -Port 443
Register-WACLocalCredSSP
Set-WACServiceSecurityDescriptor
Initialize-WACDatabase
Import-WACExistingExtensions
Import-WACExistingPlugins
New-WACEventLog
Remove-WACSetupStartMenuShortcut
Start-WACLauncher

# Express setup configuration with pre-installed certificate (server OS)
# ...
Set-WACCertificateSubjectName -Thumbprint 5...6
# ...
Express setup – Windows Client
Express setup on Windows Client OS has similar experience to server installation. Most of the configuration is the same as is on the server counterpart but there are few key differences:
- WAC service is by default listening on TCP port 6600, localhost only mode
- no automatic start for WAC service
- no inbound firewall rule for WAC on TCP port 6600
Default configuration for WindowsAdminCenter service on Windows client OS:

If we enable automatic start of WAC service and add one extra firewall rule for TCP 6600, we can now run WAC in fully functional gateway mode (on Windows Client 😊):
Express setup with self-signed TLS certificate on Windows 11 looks like this:

Express setup with pre-installed TLS certificate on Windows 11 looks like this:

# Express setup configuration with self-signed certificate (client OS)
Set-WACNetworkServiceAccess
New-Item C:\ProgramData\WindowsAdminCenter\Logs\Configuration.log -ItemType File -Force
Enable-WACPSRemoting
Remove-WACSelfSignedCertificate
New-WACSelfSignedCertificate -Fqdn CLIENT1.corp.contoso.com
Set-WACEndpointFqdn -EndpointFqdn CLIENT1.corp.contoso.com
Copy-WACTempUpdaterProcessFiles
Register-WACUpdaterScheduledTask
Register-WACService
Set-WACInstallDate
Set-WACFileVersion -FileVersion 2.4.0.0
Set-WACNuGetVersion -NuGetVersion 2.4.0
Set-WACWinRmTrustedHosts -TrustAll
Set-WACWinRmOverHttps -Enable:$false
Set-WACSoftwareUpdateMode -Mode Automatic
Set-WACTelemetryPrivacy -Mode Required
Set-WACOperationMode -Mode Production
Set-WACLoginMode -Mode FormLogin
Set-WACCertificateSubjectName
Set-WACCertificateAcl
Set-WACHttpsPorts -WacPort 6600 -ServicePortRangeStart 6601 -ServicePortRangeEnd 6610
Register-WACAccountManagementService
# N/A: Register-WACFirewallRule -Port 6600
Register-WACLocalCredSSP
Set-WACServiceSecurityDescriptor
Initialize-WACDatabase
Import-WACExistingExtensions
Import-WACExistingPlugins
New-WACEventLog
Remove-WACSetupStartMenuShortcut
Start-WACLauncher

# Express setup configuration with pre-installed certificate (client OS)
# ...
Set-WACCertificateSubjectName -Thumbprint 4...D
# ...
Express setup – remote
Because WACv2 installer forcefully enables PowerShell remoting with Enable-WACPSRemoting (it runs Enable-PSRemoting -Force), any and all remote PowerShell sessions are dropped at that time. If we use PowerShell remoting to try and install WACv2, this is where the installer fails, and we must continue with manual configuration (all the steps after Enable-WACPSRemoting).
Better option is to avoid PowerShell remoting during the WACv2 installation (if already enabled, we can still use it for preparation, to create directory, copy installer files locally,..) and use something else for remote push install. I like to use Sysinternals PsExec:
# file must be already on remote computer
.\PsExec64.exe -accepteula \\$Computer -d -h -s  C:\WAC\WindowsAdminCenter2410.exe /log=C:\WAC\WWindowsAdminCenter2410.log /verysilent
# OR -> copy (overwrite) file and run the installer
.\PsExec64.exe -accepteula \\$Computer -d -h -s -c -f WindowsAdminCenter2410.exe /log=c:\Windows\Temp\WindowsAdminCenter2410.log /verysilent
.\PsExec64.exe -accepteula \\$Computer -d -h -s cmd /c del C:\Windows\WindowsAdminCenter2410.exe
Since the installer has different defaults based on the type of the operating system (check above) where it’s being installed (Server/Client), we need to be mindful about that… Luckily for us, if/when we need to, we can customize all of the defaults with few PowerShell cmdlets.
Custom setup
Custom setup has few more steps we can use to customize default configuration. Customization options for WACv2 installer in custom mode:
- Network access: Local host access only or Remote access
- Default on Server: Remote access.
- Default on Client: Localhost access only
- Login selection: HTML Form or Windows Authentication
- Default: HTML Form Login
- External HTTPS port
- Default on Server: 443
- Default on Client: 6600
- TLS Certificate: pre-installed TLS certificate or self-signed certificate
- Default: Use the pre-installed TLS certificate
- TLS Certificate thumbprint: drop-down with suitable certificates
- If empty, and proper cert is installed: manually paste the thumbprint
- FQDN: must match certificate selection
- Default: host FQDN
- Trusted Hosts: Any computer or only trusted domain computers
- Default: Allow access to any computer
- WinRM over HTTPS
- Default: WinRM over HTTP
- Automatic updates: automatically, notify or disable
- Default: Install updates automatically
- Send diagnostic data to Microsoft: Required or Required & Optional
- Default: Required diagnostic data
Custom setup with pre-installed certificate on member server Windows Server 2022:
Custom setup with pre-installed certificate on Windows 11:
In custom installation mode on Windows Client OS, we can customize WACv2 installer to deploy gateway mode with the same configuration that we saw on Windows Server OS. The installer configures both Windows Firewall with the relevant exception and WindowsAdminCenter service with Automatic startup. Job well done 😊.
End result of custom WACv2 installation on Windows 11 (fully functional gateway mode):
Custom setup – remote
Installers build with Inno setup can support automation of installer parameters by specifying custom INF file. We can generate this INF file with /SAVEINF parameter:
Start-Process "C:\WAC\WindowsAdminCenter2410.exe" -wait -ArgumentList "/log=C:\WAC\WindowsAdminCenter2410.log /SAVEINF=C:\WAC\WindowsAdminCenter2410.inf"Sadly, this does not work for custom parameters that are used in WindowsAdminCenter2410.exe installer (most of the installation wizard parameters are custom parameters). With INF config file we can only customize five install parameters. Defaults for WACv2 (WindowsAdminCenter2410.inf):
[Setup]
Lang=en
Dir=C:\Program Files\WindowsAdminCenter
Group=Windows Admin Center (v2)
NoIcons=0
Tasks=desktopshortcut
To automate custom installation of WACv2, we must run silent installer and do all the needed customization post-installation, with provided PowerShell functions (functions listed above (for default express installation) are sorted in order they are executed during the installation).
FYI. Custom parameters are supported with Inno setup installers and can be used if the author (developer) decides to implement them (as far as I can tell, this is not yet the case for WACv2 installer – maybe in next version of installer or WACv3,…).
PowerShell cmdlets we can use to manually customize WACv2
Below cmdlets are the same, as the installers is using during the installation. Listed below are just the ones we can use to customize something. Full list of installer executed cmdlets is available in the express install section.
New-WACSelfSignedCertificate #Param: Fqdn, Trust
# Trust: export self signed certificate and import it to the Trusted Root cert store
Set-WACEndpointFqdn #Param: EndpointFqdn, ServiceFqdn, NoHosts
# ServiceFqdn: default set to EndpointFqdn, if not update HOSTS
# NoHosts: used with ServiceFqdn not to write ServiceFqdn to HOSTS
Register-WACService #Param: Automatic
# Automatic: Start mode for the service; if not used, service starts On Demand
Set-WACWinRmTrustedHosts #Param: TrustAll
# TrustAll: TrustedHosts set to *; if not used, it’s set to empty
Set-WACWinRmOverHttps #Param: Enabled
# Enabled: $True, $False
Set-WACSoftwareUpdateMode #Param: Mode
# Mode: Automatic, Manual, Notification
Set-WACTelemetryPrivacy #Param: Mode
# Mode: Required, Optional
Set-WACOperationMode #Param: Mode
# Mode: Production, Development
Set-WACLoginMode #Param: Mode
# Mode: FormLogin, WindowsAuthentication, AadSso
Set-WACCertificateSubjectName #Param: SubjectName, Thumbprint, Target
# Target: All, FrontEnd, Service
Set-WACCertificateAcl #Param: SubjectName
Set-WACHttpsPorts #Param: WacPort, ServicePortRangeStart, ServicePortRangeEnd
Register-WACHttpSys #Param: Thumbprint, Port, UserMode
# Registers configuration of HTTP.SYS
# More info in Microsoft.WindowsAdminCenter.Configuration.psm1
Register-WACFirewallRule #Param: Port
Register-WACLocalCredSSP #Param: NoWinRmServiceRestart
Update-WACEnvironment #Param: SkipSettings, SkipDatabase, NonInteractive
# Update the Windows Admin Center environment from V1 to V2
# More info in Microsoft.WindowsAdminCenter.Migration.psm1
If we want to go beyond this customization, we have to look into PowerShell modules that were installed with WACv2 (126 cmdlets in 6 modules). We can find them in subfolders of 'C:\Program Files\WindowsAdminCenter\PowerShellModules\':
- Microsoft.WindowsAdminCenter.Configuration (104 cmdlets)
- Microsoft.WindowsAdminCenter.ConnectionTools (
Export-WACConnection; Import-WACConnection) - Microsoft.WindowsAdminCenter.ExtensionTools (7 cmdlets)
- Microsoft.WindowsAdminCenter.ManagementTools (
Enter-WACPSSession) - Microsoft.WindowsAdminCenter.Migration (11 cmdlets)
- Microsoft.WindowsAdminCenter.PowerShellTools (
Export-WACDscPackage)
Few cmdlets that we might find useful in specific scenarios:
- Get-WACProxy; Set-WACProxy
- Get-WACLoginMode; Set-WACLoginMode
- Export-WACInstallerSettings
- Test-WACService; Test-WACInstalled
- Restart-WACService
- Set-WACHAProgramFilesAccess; Update-WACHAAppSettings
- Register-WACClusterScheduledTask; Unregister-WACClusterScheduledTask
- WACHARole: New; Start; Update; Remove
- Test-WACClusterRole;
- Get-WACUpdaterScheduledTask; Stop-WACUpdaterScheduledTask
- …
What about installation on domain controller?
Express setup with self-signed certificate on domain controller Windows Server 2022:

Express setup with pre-installed certificate on domain controller Windows Server 2022:

As we can see from the animations above, express installation of WACv2 on our DC has some challenges… Few missing values and then there are also two steps were the installer actually get’s stuck at:
- Configuring WinRM over HTTPS… (Set-WACWinRmOverHttps)
- Configuring login mode… (Set-WACLoginMode)
We can unstick it with Task Manager by killing the child PowerShell process that is responsible for running the script in this particular step (we have to do it twice):

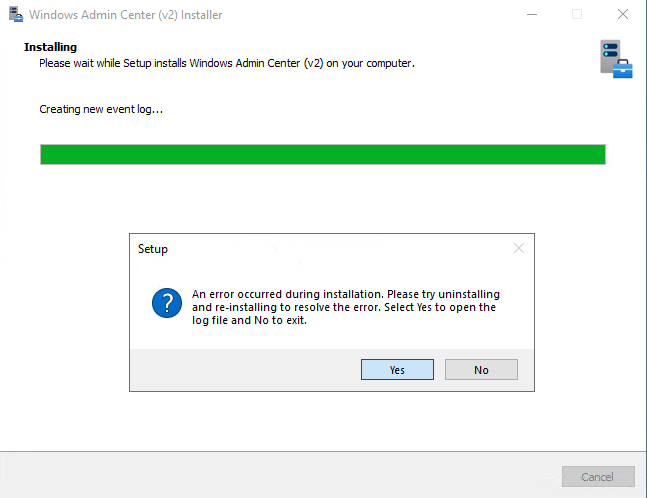
After the installation is finished, we are greeted with setup error:

If we select Yes in this final step, installer opens up Configuration.log. In this log file we can find only one error message – it’s related to Register-WACLocalCredSSP cmdlet: Failed to register CredSSP session configuration.
If we go and check Register-WACLocalCredSSP function, we’ll see that it fails because it tries to create new local group and add current user as member. Because this group is not created in local database, it can’t add current user as member. But the installer does actually create “Windows Admin Center CredSSP” group, just not locally:

Comparing steps in Configuration.log to our notes from before (same type of installation on member server), we can see that the installer skipped few steps:
Set-WACWinRmTrustedHosts -TrustAll
Set-WACWinRmOverHttps -Enable:$false
Set-WACLoginMode -Mode FormLogin
Set-WACHttpsPorts -WacPort 443 -ServicePortRangeStart 6601 -ServicePortRangeEnd 6610
Register-WACFirewallRule -Port 443
Lets try and run:
Import-Module 'C:\Program Files\WindowsAdminCenter\PowerShellModules\Microsoft.WindowsAdminCenter.Configuration'
Set-WACWinRmTrustedHosts -TrustAll
Set-WACWinRmOverHttps -Enable:$false
Set-WACLoginMode -Mode FormLogin
Set-WACHttpsPorts -WacPort 443 -ServicePortRangeStart 6601 -ServicePortRangeEnd 6610
Register-WACFirewallRule -Port 443
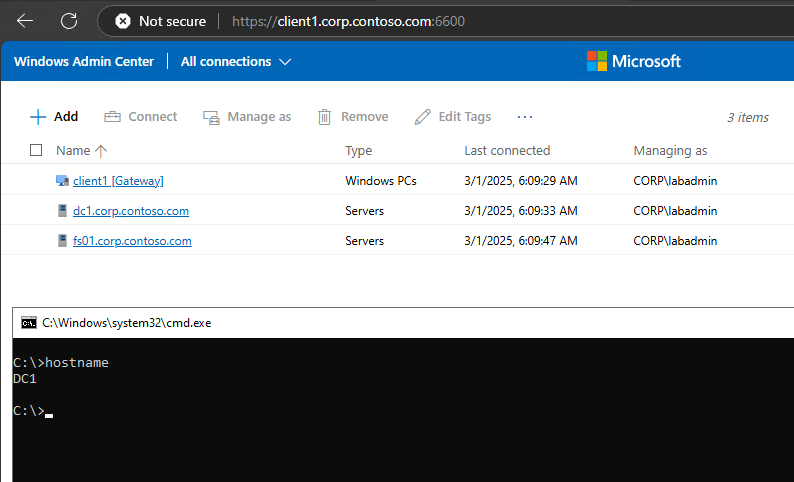
Restart-WACServiceSo, what happens if we connect to our new WAC portal? Well, it actually works 😊
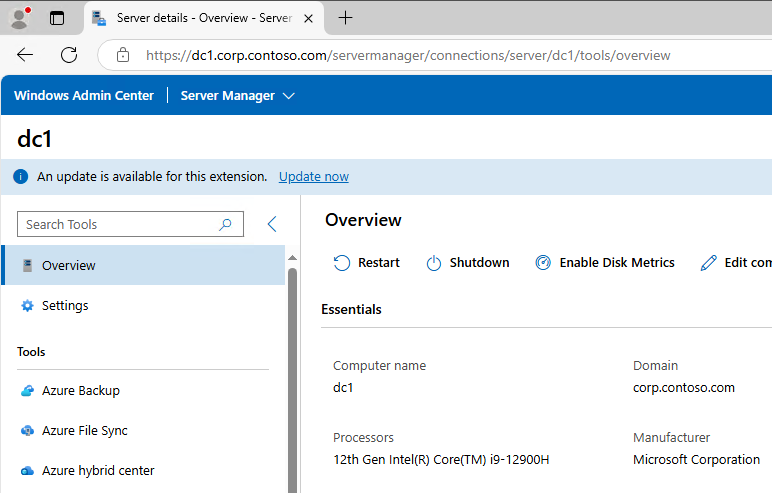
We are greeted with this nice message:

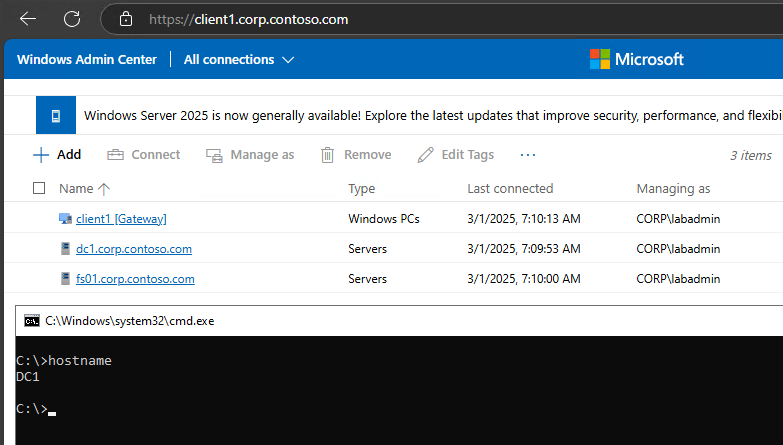
And we can connect to our servers and clients including remote access to WAC:
As far as I was able to test it, everything seems to work. At least for now.
There is one more option, we haven’t explored yet… and that is:
Custom setup with pre-installed certificate on domain controller Windows Server 2022:
We can’t see it from the animation, but all the installer options have no default value (not the case in supported installation). So when we go through custom mode wizard, we are actually setting all the missing bits that we noticed before with express mode:

At the end of the installation the installer throws the same error like with express setup:

And if we examine Configuration.log we’ll see only one error (the same like before) and this time also no missing steps.
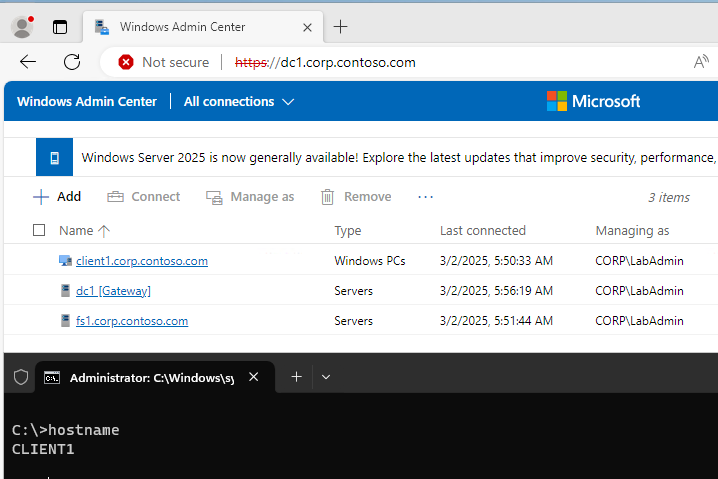
So what happens if we now open web browser and connect to it? Well, it works 😊:
Until next time…
