Archive
Windows Admin Center installation – old vs new
Windows Admin Center (WAC) is a powerful tool for managing Windows Clients, Windows Servers and Windows Clusters. In December 2023, the Windows Admin Center modernized gateway (WACmg) was released to public preview through the Windows Server Insider program. This release comes as extra version to the latest generally available release of Windows Admin Center, version 2311. Some of the core differences between the old and modernized versions are:
- Old Windows Admin Center:
o Purpose: The old WAC is the modern evolution of traditional “in-box” management tools like Server Manager and MMC (Microsoft Management Console).
o Functionality: It provides control over various aspects of server infrastructure.
o Use Case: Useful for managing servers on private networks that are not connected to the Internet.
o Backend: Utilized the .NET Framework 4.6.2.
o Web Server: Used Katana components for the backend web server.
o Extensions: Supported extensions through gateway plug-ins. - Modernized Windows Admin Center:
o Purpose: The modernized WAC is an upgraded version with enhanced performance, security, and extensibility.
o Backend Upgrade: Migrated from .NET Framework 4.6.2 to .NET Core.
o Installer Flexibility: The installer now offers customization options, including network access settings, trusted hosts, and specifying a fully qualified domain name (FQDN) for the gateway machine.
o Microservice Architecture: Adopts a multi-process, micro-service based architecture. Windows Admin Center starts one process on application startup, which serves as a process manager. Subprocesses are spun up as needed for specific tasks. Gateway plug-ins also run their own subprocesses for better flexibility, scalability, and resilience.
o Kestrel Web Server: Shifted to an ASP.NET Core Kestrel web server, supporting HTTP/2 for reduced latency and improved responsiveness.
o Impact on Extensions: Gateway plug-in extensions are most impacted with the introduction of modernized gateway. If existing extensions use components written with .NET framework version 4.6.2, they will have to be updated to use the .NET Core framework. Official guidance with code samples for building compatible plugins is not yet available (more info here).
In summary, the modernized gateway brings significant improvements to Windows Admin Center, making it more efficient and adaptable for managing your server infrastructure. More information about the features and benefits of WAC modernized gateway is available here: What is the Windows Admin Center modernized gateway (preview)?
Download WAC:
– https://bit.ly/WAC-Eval (registration required)
– Direct link: https://aka.ms/wacdownload
Download WACmg:
– https://bit.ly/WACmg-Eval (Windows Server Insider registration required)
– Direct link: https://bit.ly/WACModern
WAC installation on domain controller
WAC installation on domain controller (DC) is not officially supported:

But that doesn’t mean it doesn’t work. It works nicely, just without the official support (good enough for testing in my lab environment):

If we want to install WAC on DC, we have to modify original MSI package:

To get the installation working on DC, we can drop one row with the following condition from the LaunchCondition MSI table:
Installed OR (MsiNTProductType <> 2) OR (INSTALLATION_TYPE ~= "AzureVmExtension")
or we can customize above condition to include all MsiNTProductType(s) with:
Installed OR (MsiNTProductType >= 1) OR (INSTALLATION_TYPE ~= "AzureVmExtension")
WAC installation customization
WAC was designed to be installed on desktop and/or server OS, including server core. If installation is done on desktop OS, WAC is installed in “desktop” mode:
– no remote connectivity to WAC service,
– local management of desktop OS,
– remote management of everything supported.
If installation is done on server OS, WAC is installed in “gateway” mode:
– WAC service is available for remote connectivity (ideal with Server Core as host OS),
– local management available only on server with desktop experience,
– remote management of local server and everything else.
Based on host version, setup defaults change during the installation. One good example is default port for WAC service:

During WAC installation we can customize:
– diagnostic settings (required or required+optional)
– use Microsoft Update for updates (yes or no)
– modify trusted hosts settings (yes or no)
– WinRM over HTTPS only (yes or no)
– automatically update WAC (yes or no)
– custom port (server: 443, desktop: 6516 or any)
– SSL certificate (generate with expiration 60 days or existing cert)
– HTTP port 80 redirection to HTTPS (yes or no)
If we want to change defaults, using GUI installer is easy. If we want to automate customization so that we can run installer remotely or silently, we have to go and read installation documentation. Installation parameters mentioned in the official documentation:
- RESTART_WINRM=0 -> do not restart WinRM service during installation (WinRM must be restarted for Windows Admin Center to function)
- SME_PORT=443
- SSL_CERTIFICATE_OPTION=generate
- SSL_CERTIFICATE_OPTION=installed
- SME_THUMBPRINT=<thumbprint>
One installation warning, that is useful to know:
Don’t invoke msiexec from PowerShell using dot-slash relative path notation (like, .\<WindowsAdminCenterInstallerName>.msi). That notation isn’t supported, the installation will fail. Remove the .\ prefix or specify the full path to the MSI.
If we don’t follow the official documentation and still try to run the installer using dot-slash relative path notation, below is the error that will stop the installation:

If we want to find some additional parameters, we can use to customize and automate installation, we can check official documentation for high availability deployment of WAC. There we can find link to Windows Admin Center HA Script zip file. Script is using two extra msi parameters when it finds existing WAC installation:
– REINSTALLMODE=amus
– REINSTALL=ALL
If we want to find every possible parameter that WAC MSI supports, we have to go back to MSI tables and look at Property table:

There is one property in this table: SecureCustomProperties. This one has few extra properties that could be used to customize the behaviour of the installer:
CHK_REDIRECT_PORT_80;CORS_ORIGINS;CSP_FRAME_ANCESTORS;DEV_MODE;INSTALLATION_TYPE;LEGACY_CERT;NETFRAMEWORK40FULL;PS_VERSION;REGISTRY_REDIRECT_PORT_80;SME_AUTO_UPDATE;SME_PORT;SME_TELEMETRY_PRIVACY_TYPE_INTERNAL;TOKEN_AUTHENTICATION_ENABLED;WAC_PORTAL_URI;WEBSOCKET_VALIDATION_OVERRIDE_INTERNAL;WINRM_HTTPS;WIX_DOWNGRADE_DETECTED;WIX_IS_NETFRAMEWORK_462_OR_LATER_INSTALLED;WIX_UPGRADE_DETECTED;WIXNETFX4RELEASEINSTALLED
WAC installation automation
We can find some nice PowerShell examples for automated WAC installation in MSLab scenario: Windows Admin Center and Enterprise CA:
# Desktop mode installation on Windows Client (with self-signed certificate)Start-Process msiexec.exe -Wait -ArgumentList "/i C:\WAC\WindowsAdminCenter.msi /qn /L*v C:\WAC\WindowsAdminCenter.log SME_PORT=6516 SSL_CERTIFICATE_OPTION=generate"
# Gateway mode installation (with self-signed certificate)Start-Process msiexec.exe -Wait -ArgumentList "/i C:\WAC\WindowsAdminCenter.msi /qn /L*v C:\WAC\WindowsAdminCenter.log REGISTRY_REDIRECT_PORT_80=1 SME_PORT=443 SSL_CERTIFICATE_OPTION=generate"
# Gateway mode installation (with custom certificate)Start-Process msiexec.exe -Wait -ArgumentList "/i C:\WAC\WindowsAdminCenter.msi /qn /L*v C:\WAC\WindowsAdminCenter.log REGISTRY_REDIRECT_PORT_80=1 SME_PORT=443 SSL_CERTIFICATE_OPTION=installed SME_THUMBPRINT=$Thumbprint"
WACmg installation customization
Everything we learned about WAC installation and customization is no good to us with Windows Admin Center modernized gateway (WACmg). WACmg installer doesn’t use MSI anymore – now the installer is build with Inno Setup. Installer was designed to offer more flexibility to the admin doing the installation (more info here and here):

During the installation we can choose one of the two express options (local or remote) or custom setup. Both express options will skip customization of:
– Sign-in authentication mode (FormLogin, WindowsAuthentication, or AadSso)
– Host access network names
– Internal and external network ports
– Endpoint FQDN
– Trusted hosts mode (allow access to any computer or only trusted domain computers)
– WinRM over HTTPS (HTTP or WinRM over HTTPS)
If we want to configure any of the above options, we have to select custom setup:

AadSso Sign-in authentication mode is only available with PowerShell customization post-installation.
Good to know about the installer:
- We can install a modernized gateway build of Windows Admin Center side-by-side with a legacy gateway build if we don’t choose the same ports for both installations.
- We can install WACmg in both modes (local and remote setup) on desktop and server OS.
- WACmg installation not supported on DC but works out of the box – requires some post installation customization.
- Any and all install parameters can be changed post installation with PowerShell module Microsoft.WindowsAdminCenter.Configuration (by default available in C:\Program Files\WindowsAdminCenter\PowerShellModules\Microsoft.WindowsAdminCenter.Configuration)
- Detailed installation log with all PowerShell functions executed during the installation available in %localappdata%\temp.
- New PowerShell modules with 86 functions for WAC customization:

If we want to see the details of the installation, we can check Setup Log file (“Setup Log yyyy-MM-dd #001”) available in %localappdata%\temp. We can also unpack original installer and find install_script.iss inside of the unpacked folder.
My custom (default) installation executed PowerShell functions (in order):Set-WACNetworkServiceAccess
Enable-WACPSRemoting
Remove-WACSelfSignedCertificates
New-WACSelfSignedCertificate
Copy-WACTempUpdaterProcessFiles
Register-WACUpdaterScheduledTask
Register-WACService -Automatic
Set-WACInstallDate
Set-WACFileVersion -FileVersion 2.0.1.0
Set-WACNuGetVersion -NuGetVersion 2.0.0
Set-WACWinRmTrustedHosts -TrustAll
Set-WACWinRmOverHttps -Enable:$false
Set-WACSoftwareUpdateMode -Mode Automatic
Set-WACTelemetryPrivacy -Mode Required
Set-WACLoginMode -Mode FormLogin
Set-WACSubjectName
Set-WACCertificateAcl
Set-WACHttpsPorts -WacPort 443 -ServicePortRangeStart 6601 -ServicePortRangeEnd 6610
Register-WACFirewallRule -Port 443
Register-WACLocalCredSSP
Set-WACServiceSecurityDescriptor
Initialize-WACDatabase
Import-WACExistingExtensions
Import-WACExistingPlugins
New-WACEventLog
WACmg installation automation
Because WACmg installer (WindowsAdminCenterModernizedGWPublicPreview.exe) is build with Inno Setup, we can list all supported installer parameters with:WindowsAdminCenterModernizedGWPublicPreview.exe /HELP
orWindowsAdminCenterModernizedGWPublicPreview.exe /?
To run silent installation (no interactive prompts, use setup defaults) we can run:Start-Process "C:\WAC\WindowsAdminCenterModernizedGWPublicPreview.exe" -wait -ArgumentList "/log=C:\WAC\WindowsAdminCenterModernizedGWPublicPreview.log /silent"
To run very silent installation (no interactive prompts and no progress interface, use setup defaults) we can run:Start-Process "C:\WAC\WindowsAdminCenterModernizedGWPublicPreview.exe" -wait -ArgumentList "/log=C:\WAC\WindowsAdminCenterModernizedGWPublicPreview.log /verysilent"
Setup programs build with Inno setup can support automation of installer parameters by specifying custom INF file. We can generate this INF file with /SAVEINF parameter:Start-Process "C:\WAC\WindowsAdminCenterModernizedGWPublicPreview.exe" -wait -ArgumentList "/log=C:\WAC\WindowsAdminCenterModernizedGWPublicPreview.log /SAVEINF=C:\WAC\WindowsAdminCenterModernizedGWPublicPreview.inf"
Sadly, this does not work for custom parameters that are used in WindowsAdminCenterModernizedGWPublicPreview.exe installer (most of the installation wizard parameters are custom parameters):
WACmg INF with default values:[Setup]
Lang=en
Dir=C:\Program Files\WindowsAdminCenter
Group=Windows Admin Center (v2) Preview
NoIcons=0
Tasks=desktopshortcut
Custom parameters are supported with Inno setup installers and can be used if the author (developer) decides to implement them (as far as I can tell, this is not yet the case for WACMg installer – maybe in GA version of installer)…
To automate custom installation of Windows Admin Center modernized gateway, we have to run silent installer and do all the needed customization post-installation with provided PowerShell functions (functions listed above (for default express installation) are sorted in order they are executed during the WindowsAdminCenterModernizedGWPublicPreview.exe installation).
WACmg customization
Currently the installer doesn’t configure the extension feed for the modernized gateway. Extensions not included in the Windows Admin Center installer, including external partner extensions, aren’t available unless you add an extension feed.
Default feed configuration:


Add custom feed https://aka.ms/sme-extension-catalog-feed


WACmg installation on domain controller
WACmg installation works on DC but then exits with an error. In log files we can find error message:
Register-WACLocalCredSSP: Failed to register CredSSP session configuration.
If we go and check Register-WACLocalCredSSP function, we’ll see that it fails because it tries to create new local group (which is not possible on DC):

Because this group is not created, function can’t create PS Session Configuration file and due to this failure, it can’t register new PS Session Configuration. To get this working, we can update function to use domain group or remove this part from function.
WACmg remote installation
If we try to run WACmg installation remotely (/silent or /verysilent), the installer will stop at the Register-WACLocalCredSSP function. After installer exits with an error, we can open new remote PowerShell session and manually run function Register-WACLocalCredSSP. This will drop existing PS sessions so we need to reconnect and finalize WACmg configuration with few more functions:
Set-WACServiceSecurityDescriptor
Initialize-WACDatabase
Import-WACExistingExtensions
Import-WACExistingPlugins
New-WACEventLog
Test-WACInstallationFailure 'C:\ProgramData\WindowsAdminCenter\Logs\Configuration.log'
Start-WACService
WAC and WACmg with custom certificate
If we want to use custom certificate with WAC service, we need to allow Network Service account access to private key of the certificate used. With WACmg installer we got new PowerShell function we can use to set the required permissions: Set-WACCertificateAcl
Set-WACCertificateAcl function modifies the access control list of the certificate identified by the given subject name to grant full control permissions to the Network Service account.
Windows Server 2025 (26080) – ADPrep error 0x800b010a
There is always something new we can learn by doing things we haven’t done before. And sometimes this will bring back old memories…
Recently I started testing latest preview of Windows Server 2025 (build 26080) and I managed to stumble upon on old (looks like still relevant) problem, that I had to deal with years ago.
Before introducing new version of Windows Server as a Domain Controller (DC) (this is not required when new server becomes member server and not a domain controller) into existing environment, it’s recommended to prepare that environment with the execution of ADPrep tool (found in .\support\adprep folder on the installation media that matches the version of the server we are adding as new domain controller). As mentioned, it’s recommended and not required – if admin account doing the promotion of new server to a DC role has sufficient privileges (usually membership in Schema Admins and Enterprise Admins is sufficient), this can be done automatically (forestprep and domainprep) just by using Server Manager and adding required role with the build-in wizard:

The same would also apply when using PowerShell to promote existing member server to a DC (if admin account doing the promotion has sufficient privileges, forestprep and domainprep is automatically executed when/if needed) :
Install-WindowsFeature -name AD-Domain-Services -IncludeManagementTools
Test-ADDSForestInstallation -DomainName corp.contoso.com -InstallDns
Install-ADDSForest -DomainName corp.contoso.com -InstallDNS
Before upgrading one of the existing domain controllers (when doing in-place upgrade to a new version of Windows Server), it’s mandatory to run the ADPrep tool. Per documentation:
– For an in-place upgrade of an existing DC, you must run adprep /forestprep and adprep /domainprep manually.
– You need to run Adprep /forestprep only once in the forest for each newer version of Windows Server.
– Run Adprep /domainprep once in each domain in which you have DCs that you’re upgrading for each newer version of Windows Server.
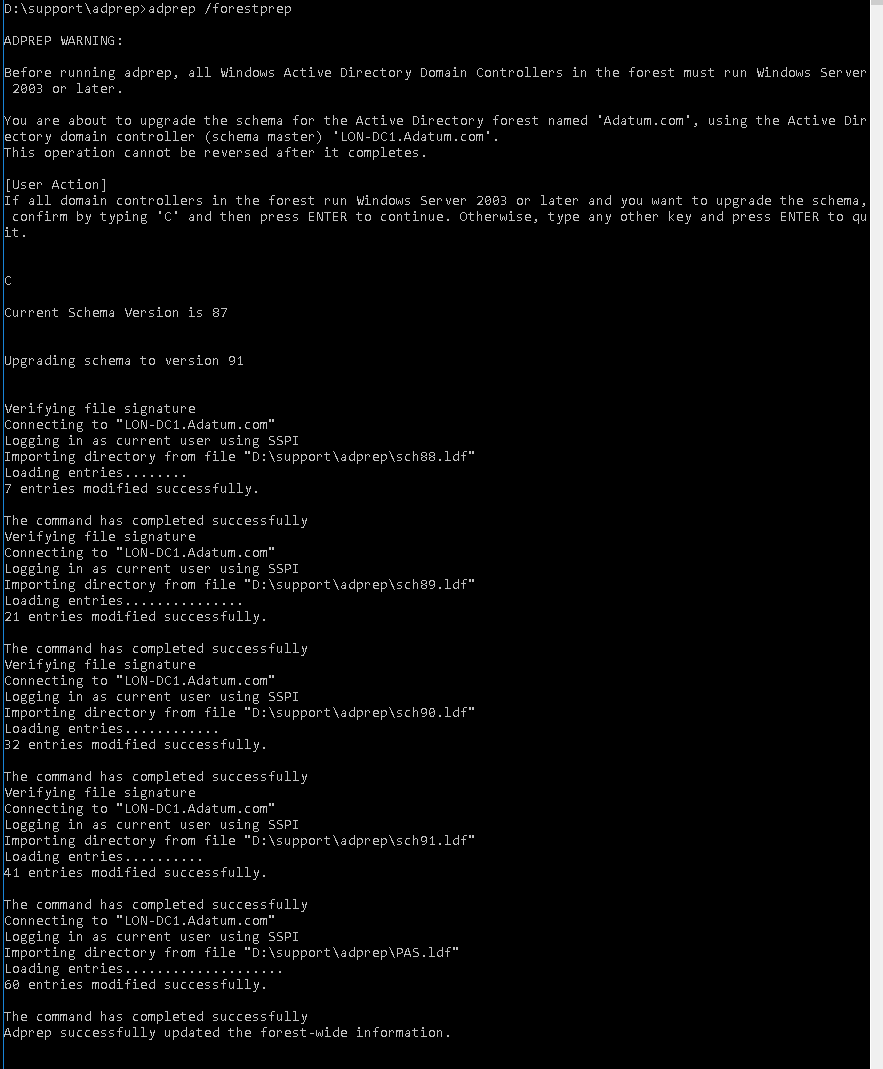
When I tried to run adprep /forestprep on one of my existing domain controllers, I got stopped with an interesting error: Failed to verify file signature: error 0x800b010a.

As it happens, I’ve seen this error years ago and the solution still works…
The problem is with the digital signature on the schupgrade.cat file next to adprep.exe tool. The root certificate used to sign this file is not trusted and because of that ADPrep fails to do its thing.

Solution is simple – just check the digital signature of the file and install the root cert into local “Trusted Root Certification Authorities” store. After that is done, ADPrep should work as expected:

It might happen that you don’t see the “Microsoft Development Root Certificate Authority 2014” certificate in the certificate path (for me this happened on server 2016 DC, that was at the time not connected to the internet):
If that happens to you too, you can save below string as CER file and import it as usual:
-----BEGIN CERTIFICATE-----
MIIGBTCCA+2gAwIBAgIQB48KnQPfEZ5DTk/sG/AjWjANBgkqhkiG9w0BAQsFADCB
lDELMAkGA1UEBhMCVVMxEzARBgNVBAgTCldhc2hpbmd0b24xEDAOBgNVBAcTB1Jl
ZG1vbmQxHjAcBgNVBAoTFU1pY3Jvc29mdCBDb3Jwb3JhdGlvbjE+MDwGA1UEAxM1
TWljcm9zb2Z0IERldmVsb3BtZW50IFJvb3QgQ2VydGlmaWNhdGUgQXV0aG9yaXR5
IDIwMTQwHhcNMTQwNTI4MTY0MzQ2WhcNMzkwNTI4MTY1MTQ4WjCBlDELMAkGA1UE
BhMCVVMxEzARBgNVBAgTCldhc2hpbmd0b24xEDAOBgNVBAcTB1JlZG1vbmQxHjAc
BgNVBAoTFU1pY3Jvc29mdCBDb3Jwb3JhdGlvbjE+MDwGA1UEAxM1TWljcm9zb2Z0
IERldmVsb3BtZW50IFJvb3QgQ2VydGlmaWNhdGUgQXV0aG9yaXR5IDIwMTQwggIi
MA0GCSqGSIb3DQEBAQUAA4ICDwAwggIKAoICAQDCD39tSbs58E2UP+j7TcXrO+Eo
WrmJKkZ+pcMzJx2CiT/rM6GHaurogrnaw5130TXAy4M2cqZXGRK8FeLIPHuDYjQU
1au23jaLoVpxplGWpwYzsyIdFGJTwqWvmkDKvixIVJnnKpNop2kZC5lpO8GyrK6U
3F+rfgLK3jyndKaMEKDlrracNe+DixDllyq6kWuaakWV2dBUcY5lP8SKU8oeOEcK
6dBBhKXaHmYBZQTmUFt3NfW0LikyDMa/X2HuMiC3fDn5Efr/YF7+xmn0bx4d7R0G
52UemhEuY0QGXzFDFzPpoyaC1EuDEk/SoSYDJUjhOr2E9YrVtG4a6HEgDkVTAWet
4x5r6LLkq/31O466Z69ZhMxcddCdqlxyxCY2oqwyTGqx+DMXRNKnfXDu63CUmrzq
uhwQS2NbON3SJUUEsvCzWnwLCo4hQGQ3EU2WaUUz5JODnvmztRwrBXHqbcznSLa2
3oBQEMpJOLNZBXBOvZ6IAiJYZInrQNqxLS1qQIhdI8M+0PXVt5CKKFQ5YqLFxrG/
dM2GlflFa8zyB+qsXNM296J6tbRyUyoGPsM3lFhYsUpxu1zNnLKvEJrZQzY+UoUZ
50IokRGMjOe73+bIVQhzdfOWDYa30uUGssCKVKhhdyB9bNH+umjzRUqvEYTrhn0v
BPNU6iD/1ds9JQJwhwIDAQABo1EwTzALBgNVHQ8EBAMCAYYwDwYDVR0TAQH/BAUw
AwEB/zAdBgNVHQ4EFgQUhXAAn3dZHoysPJ93JigZzJrBjzIwEAYJKwYBBAGCNxUB
BAMCAQAwDQYJKoZIhvcNAQELBQADggIBAE8ldL0fYk9fD/dCItfR1lMEIy7F1dcH
K2t5O19tkO0TVdOC8fUCjz75liZ+DUIYdvxgVYJahr0RMzlpD87gsCvxXRnf2NL6
hqTMzazw0K6aiyskjwPBNQ0gs9/HQup3KS4KEvwLGkWN2TGEDY0CwKz60hK/Hmo0
PuqDAKNIdU5yZi2hpRKfN6hdSndZz9Y6/DDFpgmlv7EI4/ssn3bE+05hHW0j83Zp
hetJuw33PdCqBbzdPW6ARF7ZmmjsyYnH5hoY+GCg54z25lFvDuAluGP5+cILjDyc
svBCzb7D9f5JKVWcXoaW+6HtbSaG6Lggi1zG5y0xxarKfUt9oFmkHvtQcemvz9aq
DZnejpUmlzGl9H9t9GgVuOP3rdjv0Th1Al/9bU78tvwvRRupytEeev91GBU2wSDk
X0g6let75PX29P7JSyGiqeqKmSXL6ERAkNU5tGsjm1K8wMF+F2ZuZQv1dBWWqGbt
hWhUsiTodYhkRYmFPHpla5bg8lnqRyVmD2obDD/USuZLJhdHCf7U17jgzucvlK2A
i2dwzLd7zxsrudFbvbgDXLHwG0Es5lNVFudKDkEImTfiqddtDmpF5ezjiKn9tpvD
KCDOq8KTa1FlU7+gXnudJjSaUUyMpjjVhls8Ve5Q7AALyqzcyhCr3xib0qwMjQhF
Fa+FNTVa5Sa8
-----END CERTIFICATE-----
Above certificate is base-64 encoded CER file for the “Microsoft Development Root Certificate Authority 2014”.
Windows Server 2025 – preview build 26080
Last week on 13th of March Microsoft announced (RSS) new preview release of Windows Server 2025 (Windows Server Long-Term Servicing Channel (LTSC), build 26080). This preview build contains both the Desktop Experience and Server Core installation options for Datacenter and Standard editions, Annual Channel for Container Host and Azure Edition (for VM evaluation only):

To download evaluation (build 26080 will expire after September 15, 2024) version of new Windows Server 2025, go to Windows Insider Preview Downloads. To download preview Server versions, you need to be a member of the Windows Insider program. If you are not yet an insider, you can register for free here.
Besides English (US) version, you can also test server in few other languages:

Two of the most interesting changes in this new release are:
– Win32-OpenSSH server component is now installed by default,
– winget in Windows Server with Desktop Experience.
Starting in Windows Server 2025 the Win32-OpenSSH server side component (SSHD) will ship installed by default and if/when needed, it just needs to be enabled/disabled:

By default, when SSH is enabled, it will allow inbound connection on private networks (only) on the default TCP port 22. New local group “OpenSSH Users” can be used to allow remote connectivity for non-admin users.
Enable command that is executed in the background:
Get-Service -Name sshd | Set-Service -StartupType Automatic -PassThru | Start-Service
Disable command that is executed in the bckground:
Get-Service -Name sshd | Set-Service -StartupType Manual -PassThru | Stop-Service -Force


To customize default SSH config, you can edit file “C:\ProgramData\ssh\sshd_config”.
Some of the defaults:
AllowGroups administrators “openssh users”
HostKey PROGRAMDATA/ssh/ssh_host…
AuthorizedKeysFile .ssh/authorized_keys
Match Group administrators
AuthorizedKeysFile PROGRAMDATA/ssh/administrators_authorized_keys
Winget (Windows Package Manager) is command-line tool originally available on Windows 11 and modern versions of Windows 10. It allows admins and users to manage (install, uninstall, upgrade,…) locally installed applications. Winget is designed to help you quickly and easily discover and install custom software packages (by default from two sources: winget and msstore, with support for more).
Until you start managing applications with a solution like AppLocker, you might want to use GPO to disable winget.
If you want to test matching version of Windows Client, you can also download Windows 11 Insider Preview Build 26080:

Since Windows 11 Insider Preview Build 26052 you can natively run sudo on Windows 11, you just need to enable it:

Unlike winget, for this one I do hope it gets added to Windows Server at some point…
More info:
– Announcing Windows Server Preview Build 26080
– Introducing Sudo for Windows
